For this project we were tasked with creating a Character and Vehicle of our choice.
Character:
Influences:
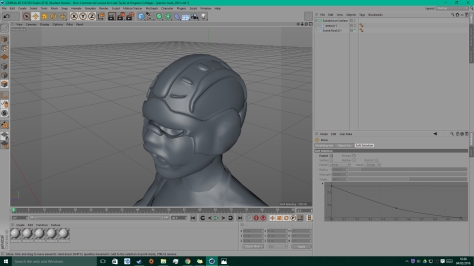
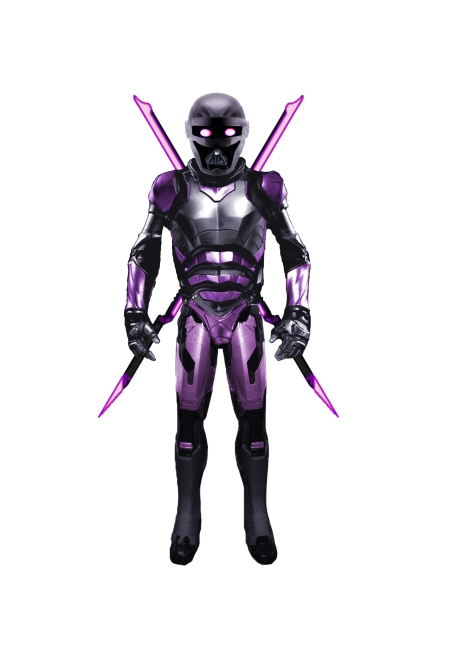
For the character my idea was to make a sort of Ninja character, at first I was unsure on how to portray this; Feudal Japan Ninja, Armoured Ninja, Assassins creed like character or something completely different. In the end I decided to go with a futuristic space like Ninja. I got influences from Tron, Ender’s Game, Silver Samurai from Marvel Comics, Predator and Robocop.

_(Earth-616)_from_All-New_X-Men_Vol_1_13")


What Changed?
My character is quite different to what I intended, I made it much more alien like than I was first planning to by adding lots of tendrils/spikes extruding from the costume, as I thought it would help me to add more detail to my character to improve it and would make it more creepy looking. I stuck with purple colours which is what I first decided to use. I did add a tiny bit of gold to the belt on the front. At the start of making the character I was not sure how to begin, the first way I started to make the armour did not work very well, so I rethought and found a much easier way to make it. At first I tried to use the body template from the content browser, but I did not like how that worked, one thing was that I did not want my characters arms to be sticking out, I wanted them by their side and if you moved the arms down it looked very weird. So I looked on YouTube and found a way to import body meshes from Skyrim. I found the Skyrim meshes much easier to use and the arms are already at the side on them.
Vehicle:
Influences:
For the vehicle I decided to make a futuristic hover-bike. I got ideas for this from; Tron, Fifth Element, Total Recall and Blade Runner.


What Changed?
I did not really change the vehicle much from what I originally intended I did make it more rounded underneath than I first thought I might and added a few extra turbines top it. The biggest thing I changed on the vehicle was the colours at first I was going to make it stealthy with lots blacks and dark colours. In the end I decided to make my vehicle more sporty with bright orange and blue, also by adding flame decals to the side of it. Again at first I found it hard to know where to start, I found trying to get the vehicle shape right hard at first I made it in two parts, but this made vehicle look disjointed where both part were put together. So to make it look less disjointed I remade it into one whole shape by making it with various sized circles and then using the loft tool.
I took others into consideration and worked safely by keeping to my own work station, making sure my belongings where not a tripping hazard. I made sure that I was not to loud or distracting and made sure I had no liquids or food near the computer.
Overall I am very pleased with what I have created, using the different skills I have learnt to use in Cinema 4D throughout my time of learning it.


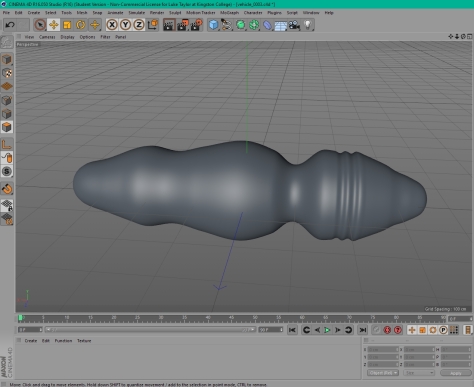


 First I selected a area for one part of the armour, I then copied it, inverted the selection and deleted the parts that I did not need. After that I just used different tools to make the selections into armour parts, the main tools that I used were; extrude, inner extrude, smooth shift and matrix extrude.